April 17, 2026ESPHome / Smoking
My Smoker Cabinet: ESPHome Control, Home Assistant, and Why I Didn't Want a Ready-Made One
ESP32-S3ESPHomeHome AssistantPID-ReglerDS18B20PT1000Räuchern
Advertising note: This post contains affiliate links (marked with *). If you buy through them, I receive a small commission — the price stays the same for you.
Safety notice — rebuild at your own risk
Mains voltage (230 V): Work on mains-powered parts is life-threatening and must only be carried out by a qualified electrician in compliance with VDE regulations.
Rebuilds at your own risk. This description is a personal documentation, not a verified build guide — you have to verify suitability for your use case yourself.
Why I Didn't Want a Ready-Made Smoker
If you smoke regularly, you know: temperature is everything. Cold-smoking must never exceed 25°C — otherwise the sausage dries out instead of absorbing smoke. Hot-smoking, I want 80°C, stable, for hours. And if I'm doing a bacon overnight, I want to see the history in the morning — not guess.
Electronically controlled smoker cabinets start around 400 euros — the cheaper ones with basic bimetal thermostats (±5-10°C hysteresis), the pricier ones with PID. But hardly any of them have: multiple temperature probes at different spots in the chamber, Home Assistant integration, history, automations. And if you want to tune the control yourself or program a smoking curve over 6 hours, ready-made devices leave you stuck.
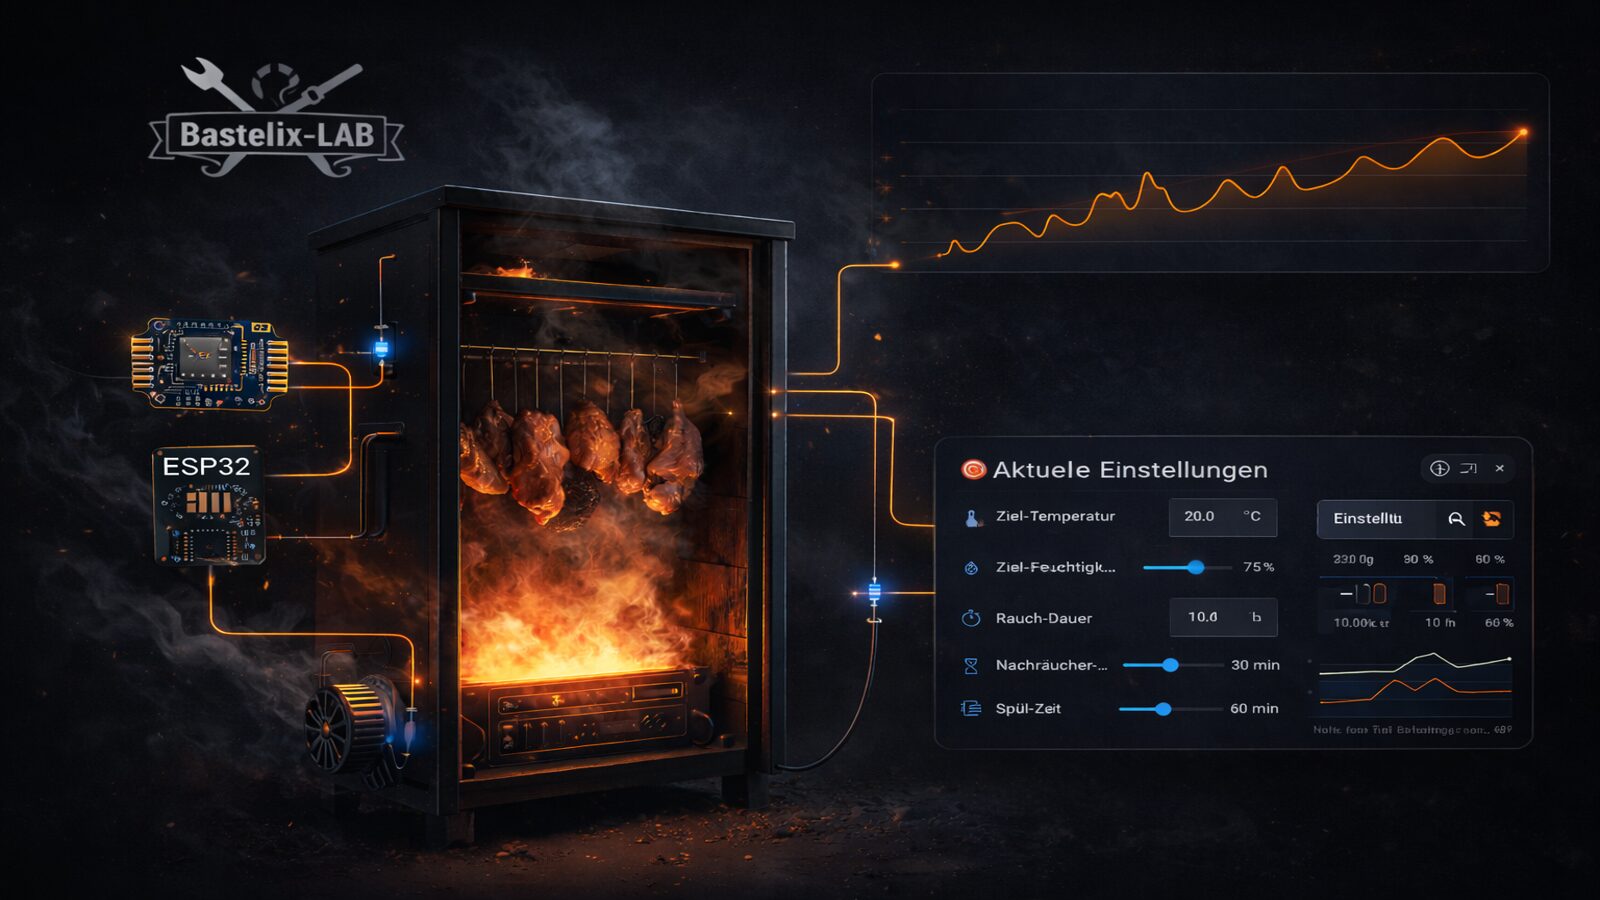
So I built the controller myself. ESP32-S3, ESPHome, Home Assistant. The cabinet itself is standard — but the electronics regulate much more precisely and do far more than any ready-made unit in my price range.
What the Controller Does
Briefly summarized, what the system does:
The heater runs via an SSR relay, driven by PWM. ESPHome switches it dozens of times per second — allowing the PID controller to modulate power almost continuously, instead of simple on/off.
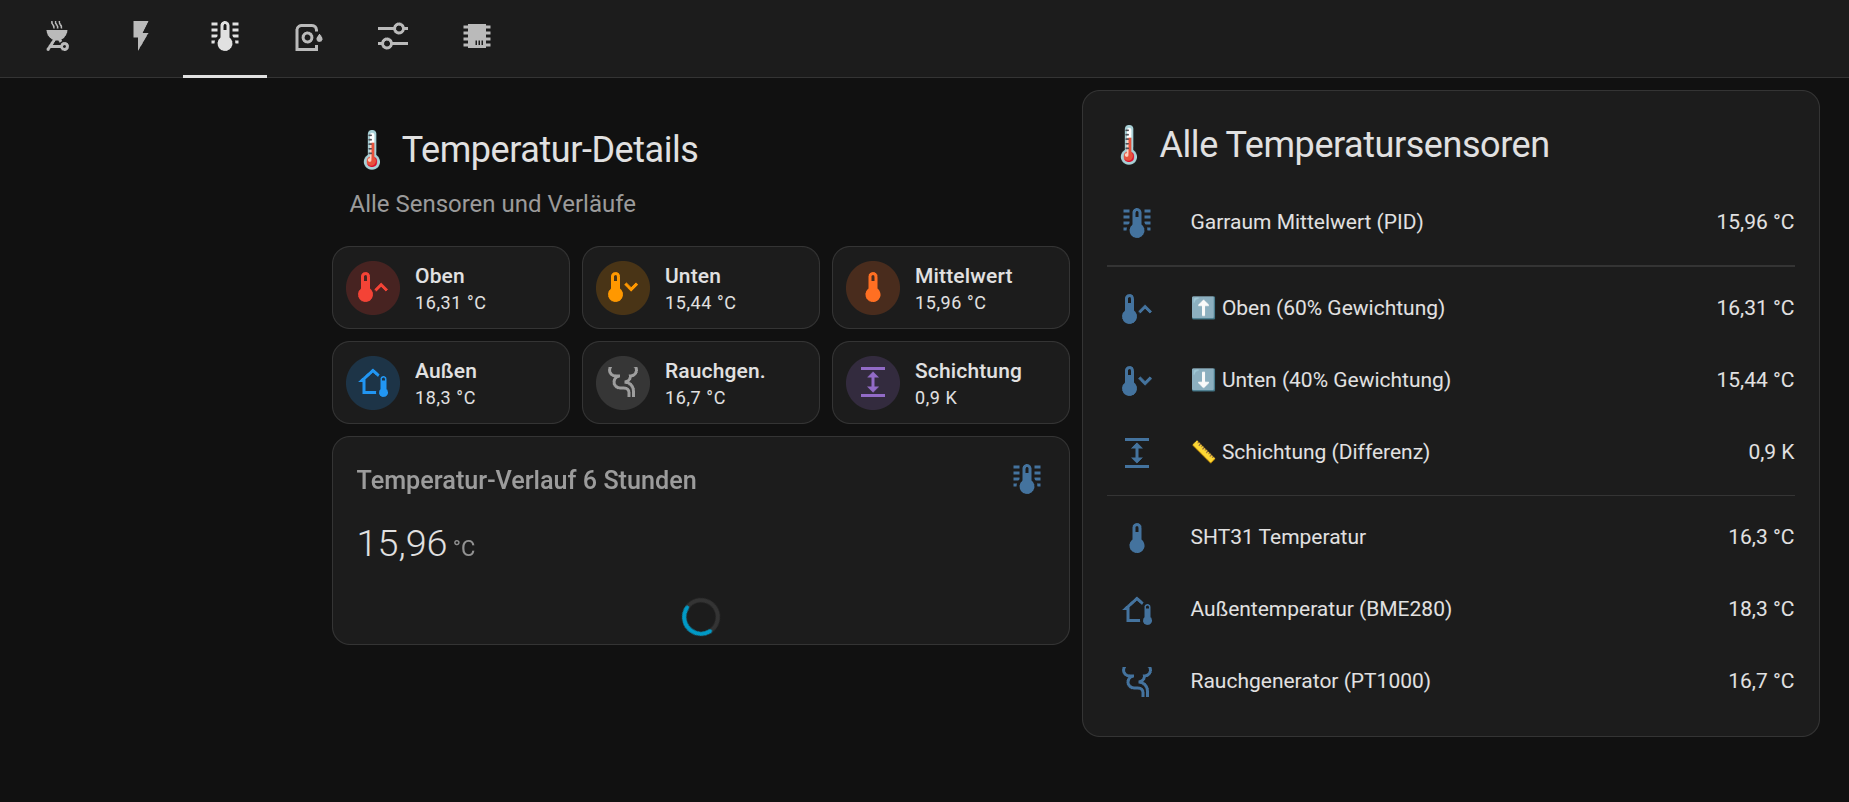
Two DS18B20 sit in the chamber — one at the top, one at the bottom. The ESP calculates a weighted average from both, which the PID regulates on. Why weighted? Depending on load and damper position, the air stratifies differently inside — the top usually runs hotter. The weighting balances that out and regulates on the actual average where the food hangs.
A BME280 on the outside reads ambient temperature and humidity. These values feed into the adaptive power calculation — how much heat the cabinet loses at current ambient conditions partly determines the maximum power the PID is allowed to drive.
Separately, the smoke generator runs — a small stainless steel box next to the cabinet where the wood chips smoulder. I use beech chips type 11 with 4-6 mm grain size — they burn through evenly, produce little ash, and give a mild, classic smoke flavour. An air pump pushes combustion air in, and the resulting smoke is routed into the smoking chamber. In the zone where the chips glow, things get genuinely hot — a DS18B20 wouldn't survive it for long. So there's a PT1000 via MAX31865 mounted on the outside of the housing, right at the burn zone. Based on the temperature measured there, I regulate the air pump so the chips smoulder cleanly without the generator overheating.
An MS24 servo (270° travel) moves the exhaust damper. In Home Assistant I have a number slider from 0-100%, the current position is reported back live.
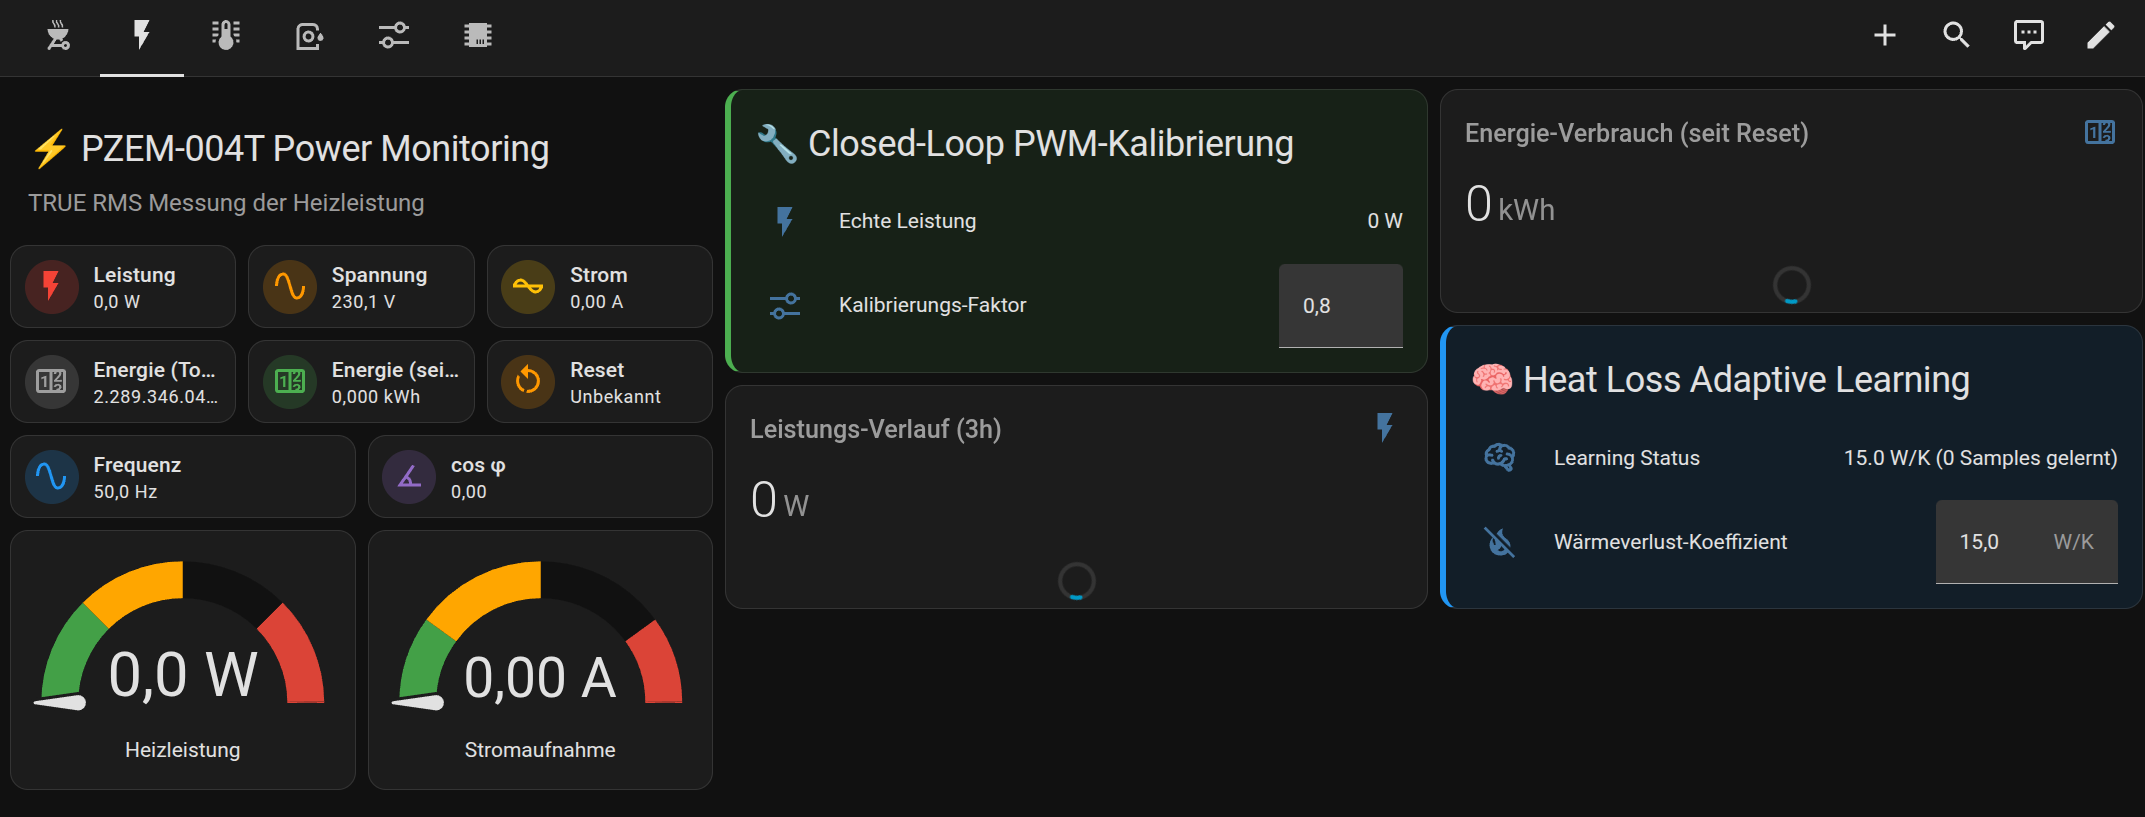
A PZEM-004T v4.0 measures the cabinet's power consumption via Modbus-RTU. So I don't just know *what* I'm smoking, but also *what it's costing me*.
Everything feeds into Home Assistant, no cloud, no vendor lock-in. Climate entity, sensors, number, buttons — enough to run the whole setup from the Lovelace dashboard.
The Hardware
Here's what's actually installed:
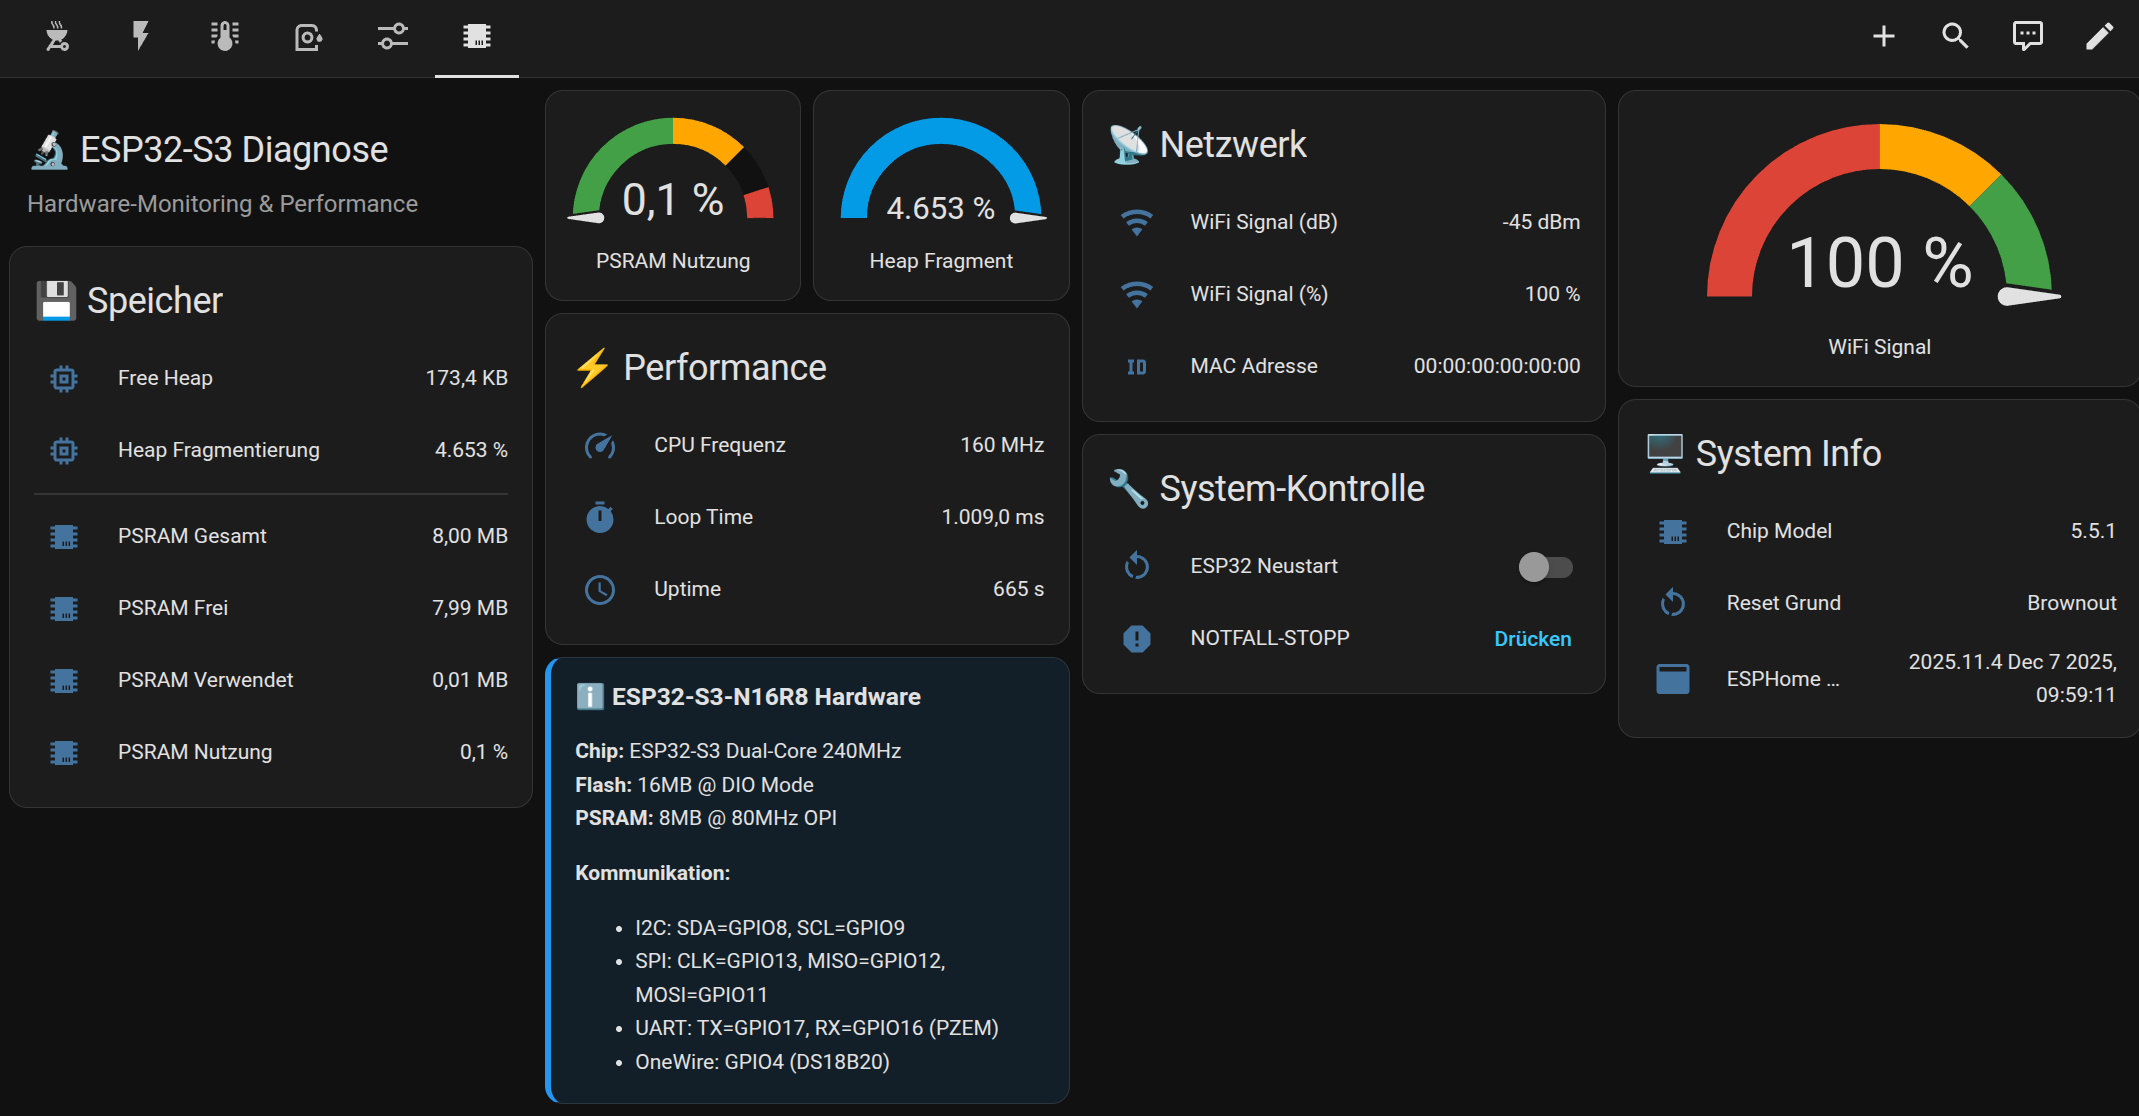
- **ESP32-S3 DevKit-C (N16R8)* — the brains of the setup, 16 MB flash, 8 MB PSRAM. Around 10€.
- DS18B20 waterproof, 1 m cable* — 2x, top and bottom inside the chamber. About 3€ each.
- BME280 breakout* — ambient temperature and humidity (I²C). Supplies the inputs for the heat-loss model.
- JAOGAUS cold smoke generator, stainless steel, with pump* — 1.1 l burn chamber for chips or pellets (2-10 mm), built-in air pump, 3-4 h burn time per fill. Around 53€.
- PT1000 with MAX31865 breakout* — mounted on the outside of the smoke generator housing, right at the burn zone. It gets hot there — a DS18B20 wouldn't cope. PT1000 easily handles 200°C+ and is more accurate.
- SSR-40DA solid-state relay* — switches the heater. No contact arcing, no mechanical wear, PWM-capable.
- MS24 servo 270°* — moves the exhaust damper. 270° travel so the damper can fully open or close.
- PZEM-004T v4.0* — energy monitoring via Modbus. Voltage, current, power, kWh. Separate CT.
- Beech smoking chips type 11, 4-6 mm* — consumable for the generator. Type 11 is the standard grading in smokehouses, 4-6 mm is ideal for slow smouldering under regulated air supply.
Plus a 5V/12V PSU, terminals, enclosure and wiring. Without the heater you end up around 100 euros for the whole controller.
Note on mains voltage:** The SSR switches 230V — if you're not comfortable with mains wiring, have the heater side done by an electrician. The low-voltage side (ESP32, sensors, servo, signal lines) is harmless except for the terminals going into the SSR. The 230V side isn't — and the smoker sits outside in damp air. Pack everything into an enclosure with the right IP rating, and don't skip the RCD.
PID Control with Deadband: Cleanly on Target
A PID controller calculates three components from the actual vs. target temperature and sums them to drive the heater:
- P (proportional): the further from target, the more power
- I (integral): compensates for persistent offsets — e.g. when moist contents keep the target just out of reach
- D (derivative): damps — if the temperature is rising fast, the controller backs off early to prevent overshoot
The art is finding the right parameters. For me, kp=0.12, ki=0.0008, kd=1.0 works well — the cabinet settles cleanly in the 40-100°C range, without oscillating or being sluggish.
On top, I use ESPHome's deadband feature. As long as the actual temperature is within ±0.3°C of the setpoint, all PID components are zeroed and just an averaged output keeps running. Result: the heater doesn't get nervous from measurement noise, and the control stays calm and precise.
The full YAML snippet lives on the project page.
Adaptive Max-Power: Why the Cabinet No Longer Overshoots
Now for the part I've never seen in any commercial product. A pure PID controller has a known issue: with a cold cabinet and a 80°C setpoint, the P term says "100% power". The cabinet runs flat out, stores a lot of residual energy in the walls — and then overshoots 5-10°C past the setpoint before settling.
My solution: every 30 seconds, the ESP calculates a max-power value that caps the PID output. The logic is simple but effective:
- Error > 5°C → 100% heater allowed (far away, full power)
- Error > 2°C → 50% (getting closer, back off)
- Error > 1°C → 30% (approach gently)
- Error < 1°C → heater power = heat loss × 1.5, clamped to 10-30%
The last step is the key. As soon as we're close to the setpoint, maximum power is pegged to the actual heat loss — that is, how much energy the cabinet bleeds off per second at the current ambient temperature. No more power than that is needed. The cabinet *physically can't* overshoot, because it never receives more energy than it dissipates.
On top runs a second loop every 5 minutes that learns the heat-loss coefficient itself. When it detects a stable state (actual ≈ target, no change), it measures real consumption and corrects the coefficient. The cabinet literally learns its own thermal characteristic over time.
Result: warming from 20 to 80°C takes about 12 minutes, and the temperature settles cleanly on target without overshoot. The YAML for this also lives on the project page.
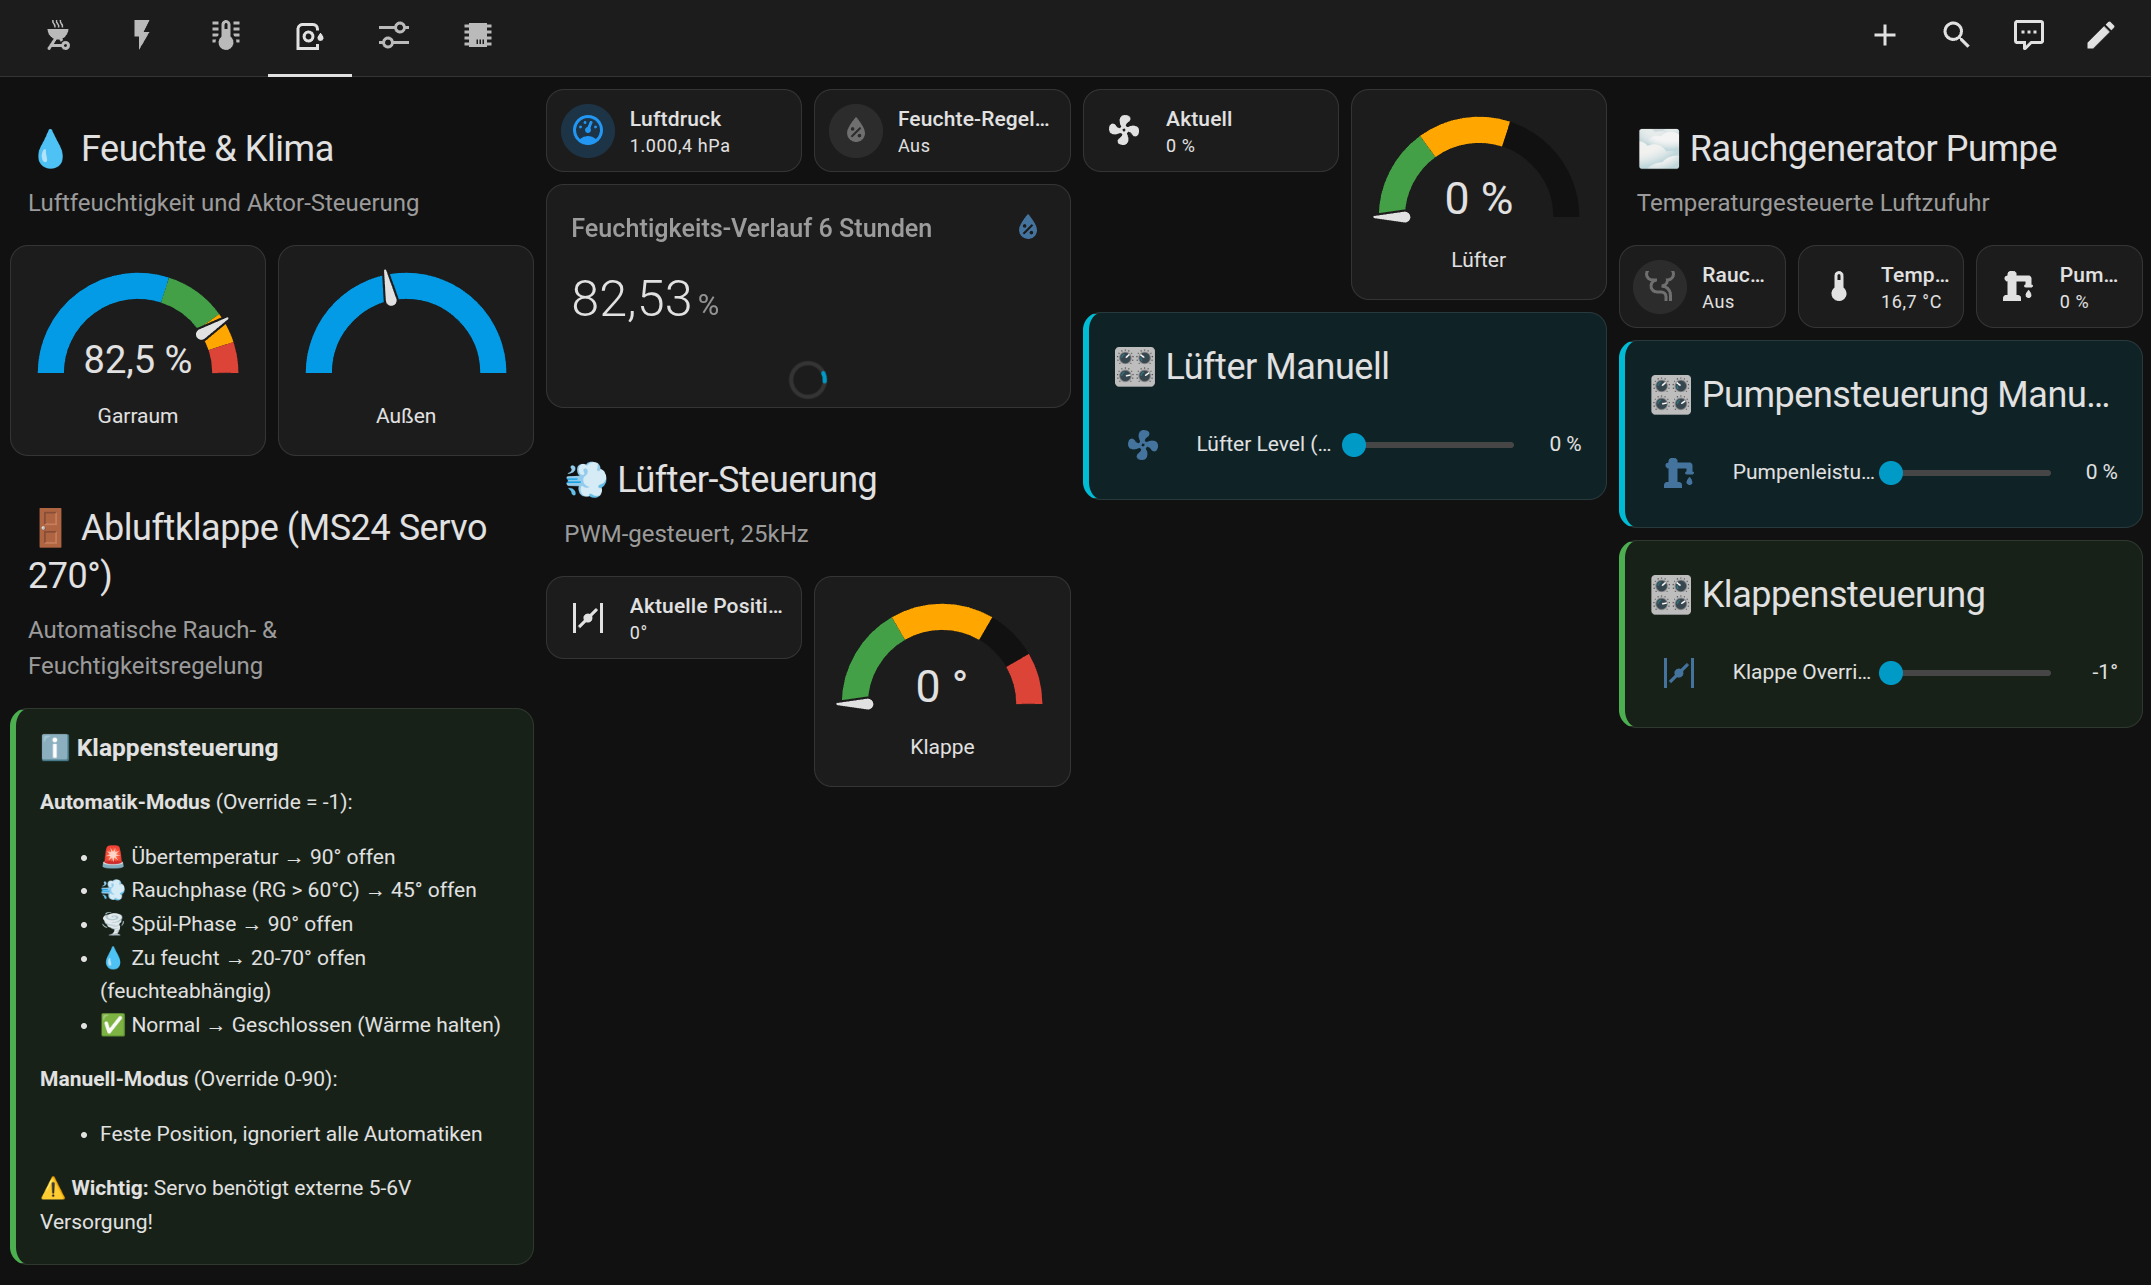
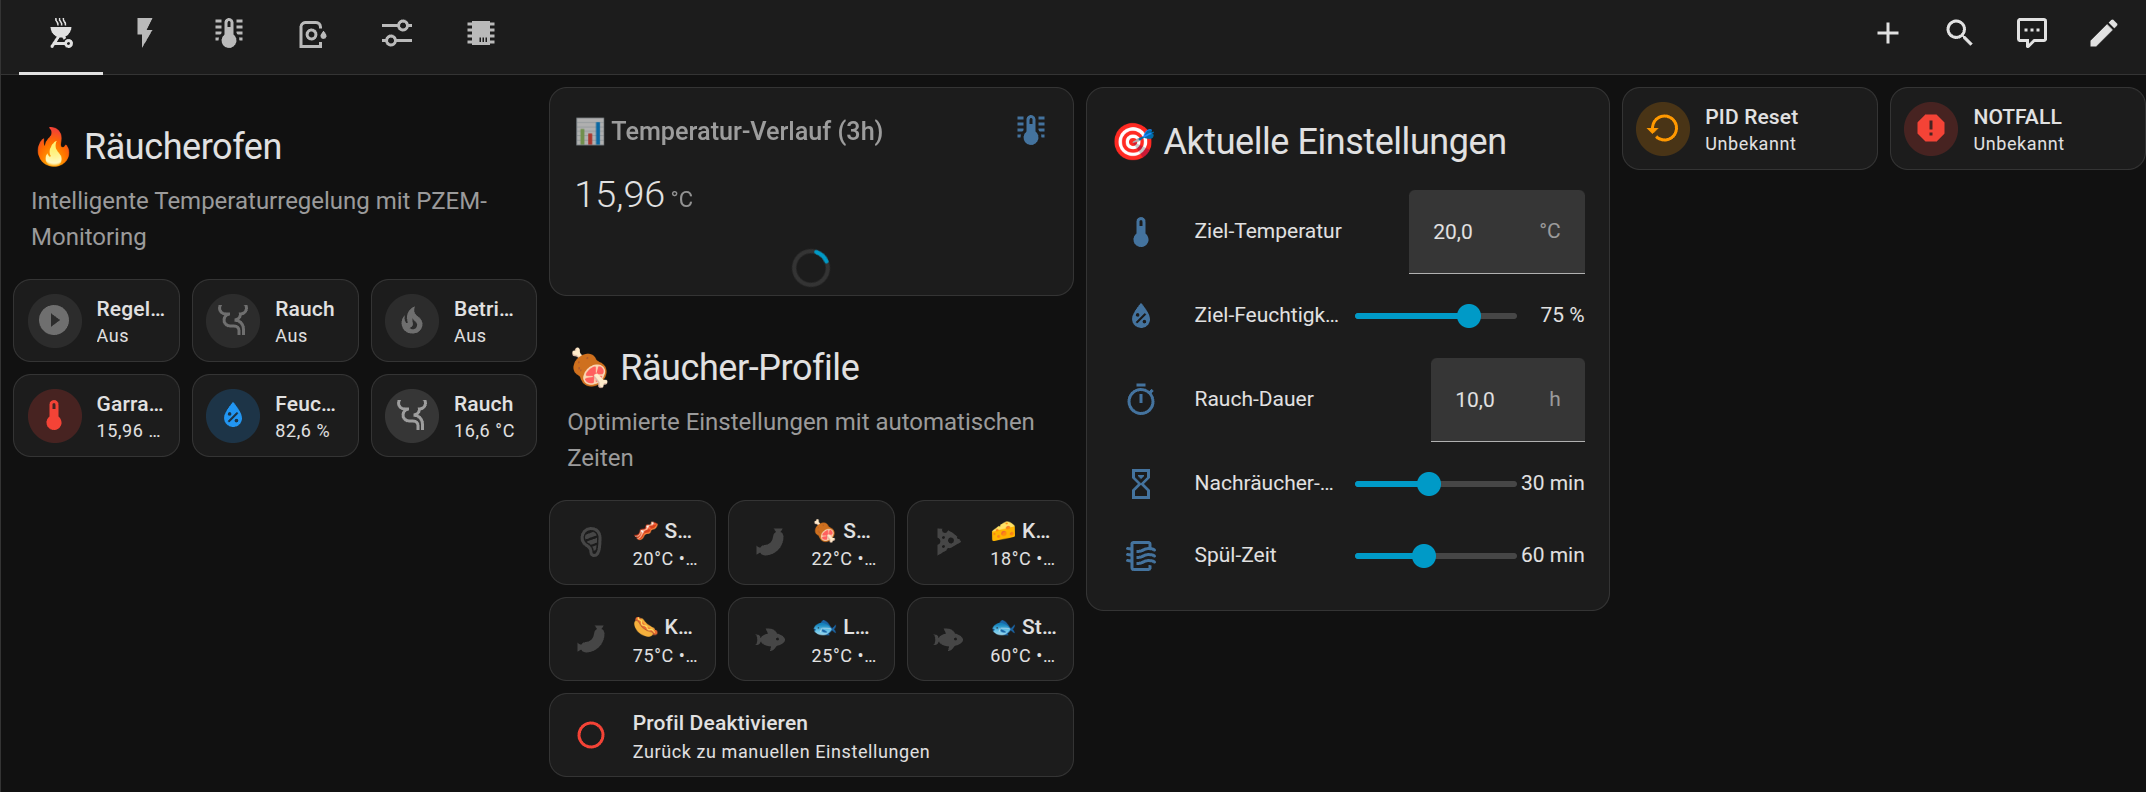
Home Assistant: Dashboard, Automations, History
Home Assistant picks up the system automatically — thanks to ESPHome auto-discovery, no manual configuration needed. In my Lovelace dashboard I have:
- a climate card with actual + target temperature and mode switch (off/heat)
- three temperature gauges for top, bottom and meat core
- an energy card with daily and total consumption from the PZEM
- a number slider for the damper position (0-100%)
- buttons for my typical profiles: cold smoke 20°C, hot smoke 80°C, ham cure 65°C
On top, the automations you just can't build on a ready-made device:
- Core temperature reached → Telegram push. When the bacon hits 68°C, the message lands on my phone. No more running outside.
- Multi-hour smoking curve. An automation gradually raises the setpoint — gentle drying at 30°C first, then smoking at 50°C, finally finishing at 80°C.
- Power consumption alarm. If the heater suddenly pulls significantly more than usual, something's off (damper closed, sensor faulty). Push comes immediately.
- History. Every temperature trace, every damper position, every wattage value stays logged. Next run, I can check last time's result and tune accordingly.
What It Does Better Than a Ready-Made Device
An electronically controlled smoker cabinet costs 500-1500 euros and does three things at its core: hold a temperature, count down a timer, maybe show an LED display. What I end up with for around 60 euros of electronics:
Precision. A classic bimetal thermostat switches with ±5-10°C hysteresis — the PID holds the temperature much more consistently. For cold-smoking that's decisive — a few degrees too high and the sausage dries out instead of soaking up smoke.
Multiple sensors. Top, bottom, external, exhaust. The PID regulates on the chamber average, but I see each individually. If the top is 5°C hotter than the bottom, I know: open the damper further, or rearrange.
No overshoot. Adaptive max-power brings the cabinet up smoothly. With a standard thermostat the first bacon always went in too hot — problem gone.
Full history. Every temperature curve from the last six months is available. *"How was the curve for the last salmon?"* — a minute of searching instead of flipping notebooks.
Automatable. Smoking phases, core-temperature alerts, power consumption — all controllable via Home Assistant. No commercial unit can do this.
Extensible. If I want to add a humidity sensor in two years, or fully automate the damper: a few lines of YAML, reboot, done.
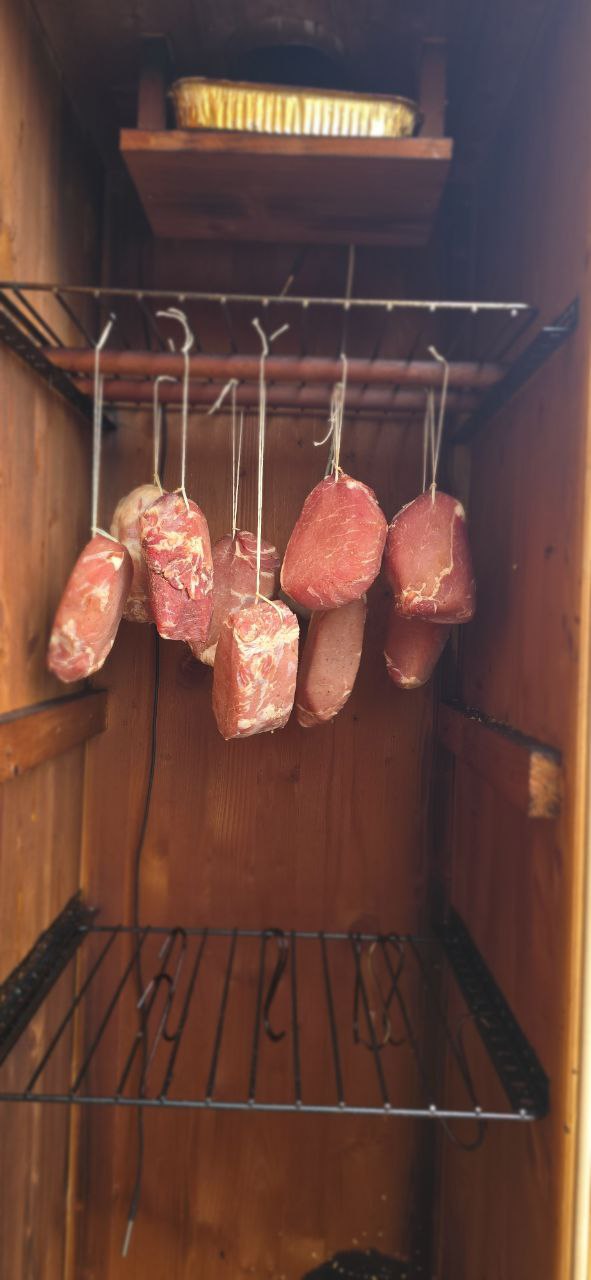
The cabinet itself is a self-build — a wooden panel on the outside, an insulation layer in the middle, another wooden panel on the inside. No high-tech enclosure, just a solid, well-insulated smoking chamber. The controller makes the difference. If you smoke regularly and already have Home Assistant, there's really no way around it.
More technical details about this project:
View Project →* Advertising — Links marked with an asterisk (*) are affiliate links. If you purchase through these links, I receive a small commission — the price stays the same for you.
Mike Sobczinski
Embedded developer and shift worker in the semiconductor industry. Builds IoT solutions with ESP32, LoRa, and Home Assistant — from firmware to dashboard.
Learn more →